Soak macadamia nuts in water for 8 hours. After 8 hours, pour into a blender with vanilla and a pinch of salt. Blend on high power for about two minutes. Strain with a nut milk bag over a large jar or bowl. Pour strained milk into a jar with a lid and refrigerate for up to a week. Separation may occur while stored. Shake well before using.
8 oz
Carbs 2g
Fat 4g
Protein 1g
Calories 40
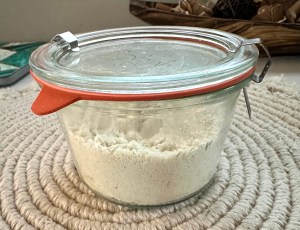
You can take the pulp and put it in baking recipes, I like to dry it out in an oven on a baking sheet. 200 degrees for an hour. After drying, grind in a coffee grinder to a fine flour and use for baking.
Keto No Grain Bread?? Made with Egg Whites
This is my best egg white bread yet! I’m finding how important it is to weigh instead of measure the egg white powder. The texture is amazing!
Weigh your egg white powder! It makes all the difference. Recipe here: https://youtu.be/JlOAAcVi-AI
Keto Crepes Flourless Sugar Free Gluten Free
Into blender put: 4 eggs 2 T Heavy Cream 1/2 t Salt 2 T Gelatin 1 T Powdered Sweetener 1 t vanilla
Spray crepe on with avocado oil spray Make sure pan is hot Swirl batter onto pan Tilt pan to fill In holes Spread with crepe spreader or spatula Flip once batter is dry
Filling: Heavy cream Salt 2 T Sweetener Vanilla
PSMF Bread Egg White Bread
This recipe is based on Maria Emmerich’s Easiest Protein Sparing Bread recipe.
Egg white powder is found on keto chow website under “BOTTLES & MORE” category (enter lowcarbrevelation discount code) Keto Chow Egg White you can also find it here
You will get the best result in texture if you weight the egg powders on a scale accurately. The texture is much better when weighed out vs. measuring.
1 1/2 cups of water (354ml) 120g egg white protein powder (1 1/2 cups) 1/2 tsp cream of tartar 1/2 tsp salt 1/4 -1/2 cup allulose (36g) the more allulose you add the softer the bread 6g egg yolk powder (1 tablespoon)
Preheat the oven to 325 degrees. Add the water to the bowl of your stand mixer and then add in the egg white powder, cream of tartar, salt and allulose. Start the mixer with the whisk attachment on low speed. Gradually increase the speed until full. Mix on full speed for 5 minutes. Reduce speed to low, add in the egg yolk powder and mix just until combined and no lumps are left. Spread the batter into a parchment paper lined loaf pan. Bake in the preheated oven for 40 minutes. Remove from the oven and allow to cool in the pan on a wire rack for about 10 minutes. Remove from the pan and allow to rest on the wire rack until completely cool to the touch. Slice and enjoy.
One Slice Macros: Total Carbs 0.1g, Fat 0.5g, Protein 6.6g, 38 calories
Homemade Taco Seasoning
I have been making my own taco seasoning for a long time. It’s easy and easy to get ingredients, you maybe already have all of them already.
Ingredients
6 tablespoon chili powder
4 teaspoon ground cumin
3 teaspoon paprika
2 teaspoon garlic powder
2 teaspoon onion powder or dehydrated onions or both
1 teaspoon black pepper
1/8 – 1/4 teaspoon cayenne pepper
2 tsp salt
Mix all together and that’s it. I store mine in a pint jar in my spice cabinet. You can change up any of the ingredients if you don’t like something or if you like it more spicy, that’s the beauty of this blend.
Serving Size one tsp
Total Carbs 1g
Fiber 1g
Calories 7
Beef Tallow Recipe Keto/ Carnivore Approved
What Is Beef Tallow?
It is put simply rendered, or heat-processed, beef fat.
The rendering process consists of gently cooking and liquifying raw beef fat. Once liquified, it’s allowed to cool and harden. This makes it shelf-stable, just like butter or coconut oil!
Tallow has a high 400°+ F smoke point which means it can be used for both baking and frying.
My husband and I have been living the ketogenic lifestyle and we are both feeling great! We are losing weight, feeling energetic and healthier then we have in quite sometime.
We decided to make our own beef tallow. It is surprisingly easy to make. We thought we would share how we made our first batch.
We have used it when we make eggs, low carb chili and deep fried wings. Did you know that Buffalo Wild Wings uses beef tallow when frying their wings? That’s what makes them so good!
We started with the main ingredient, beef fat. We have a local meat processing facility near us and they have a little shed where they have a freezer full of bagged fat trimmings for sale. We have bought it a few times to feed the birds, the birds love it! We got our fat or suet from there. It comes in bags of 3-4 lbs. It’s the honor system, you leave $2 per bag. My husband picked up three fresh bags and we went to work.
If you don’t have access to beef fat, ask a local butcher or if you are preparing a large brisket that you are trimming fat from, save the scraps in the freezer and you can use that for rendering also.
We started by cutting up the fat. When we made our first batch we used bigger chunks. It took a while to render down that way so we used our meat grinder for the rest and it worked out great!
This is our grinder. We bought it from Amazon. Here is the link for the one we have https://amzn.to/3675mVS We have used it for grinding venison as well. It’s a nice machine.
I recommend grinding a bunch at one time since you already have everything out.
My handsome husband ground up all the fat at once.
We used a coarse grind. The fat was partially frozen. It makes it easier to grind that way.
The next step was to start rendering. We filled large pots with the fat. I added a small amount of water, around a cup and a tablespoon of salt. Then set the heat to the lowest setting. LOW & SLOW is the key. You don’t want a boil.
The fat slowly cooks down into a liquid. We took turns checking and stirring the pot, making sure nothing was sticking.
This was when it was close to done. We heated until nearly all the fat pieces were melted into liquid fat.
Next we strained the liquid. I only had a small metal strainer so I will be purchasing a big one but we made this work. We used a milk bag that I bought off Amazon, you can find them here, https://amzn.to/3pdUEDZ. We poured the liquid into a large bowl so it could firm up and separate from any water that was left behind.
This is a glass bowl we used and you can see it firm up better. Any water will be left at the bottom when the fat firms up.
This was a picture after we started scooping out the fat. You can see the water left behind that we tossed.
Look at all that marvelous fat! We decided to go one more step in the purification.
We took the beautiful solidified fat and melted it down one more time on the stove, low and slow.
We once again strained the liquid and poured the liquid into clean glass jars.
Below are some pictures of some wings we deep fried in the tallow. They came out so delicious!
We started with three 3-4 lb bags of fat trimmings. We ended up with 8 quarts of beef tallow. It can be used for sautéing and deep frying. Beef tallow can be stored at room temperature, refrigerated or frozen.
Here is a list of supplies that I recommend:
Large Stock Pot
Grinder
Ladle
Mixing bowls
Cheese cloth or nut milk bag
Metal fine strainer
Glass storage jars with lids
We also put down wax paper to make clean up easier. Here is most of our supply 🙂
Quick Easy Instant Pot Rotisserie Chicken Bone Broth
Here is a recipe I make with the leftover carcass from a rotisserie chicken for bone broth.
Ingredients;
Rotisserie chicken leftover carcass
1/2 cup diced onions
1/2 cup diced carrots
1/2 cup diced celery
2 garlic cloves
1 T Italian seasoning
Pepper
1 T chicken broth base
8 cups water
Oil
Sauté veggies in oil on the sauté setting until tender.
Add seasonings.
I like to put one tbsp of this chicken broth base for extra flavor. I found this at Walmart.
Next, add the whole carcass into the pot and eight cups of water.
Set instant pot time on manual for 8 minutes and natural release. After pressure has released, use tongs to remove the bones from the pot. Next use a milk bag to strain the broth into a large bowl.
Once cool, pour into a large airtight jar and store in the refrigerator. Just warm a mug full at a time. This is so tasty and very healthy to sip on everyday.
I Canned Chicken In My Instant Pot Max
I have canned for years, but I’ve always canned foods that you could water bath can. If it involved a pressure cooker I was not interested. I guess I’ve always felt leery of using one.
Well, I’ve been using my Instant Pot for sometime now, I’m very comfortable with it and I ended up recently purchasing an Instant Pot Max that has a canning setting and I thought, why not?
You shouldn’t pressure can in a regular instant pot you can only water bath can, you can’t watch the temperatures on a regular instant pot. You should only use the Max for pressure canning. Pressure canned foods need to maintain a certain temp for a certain time to kill spores, and you can monitor it on the Max
Here is a step by step on how I canned chicken breast:
I started with sterilizing my jars. You only have room to can four pint jars in the Max at one time.
To sterilize, I placed the jars into the instant pot on top of the metal rack. I poured water in around the jars to cover about 1/4th of the way up the jars.
I set the instant pot on canning for 10 minutes on low pressure and natural release. This sanitized the jars. Meanwhile, I simmered the lids and rings on the stove.
Once the jars were sterile, I removed them with a canning jar lifter and set them on a towel and let them cool down.
Once cooled, I packed fresh, raw chicken into the jars. I only packed chicken, no liquid, no seasoning, the meat makes its own juice as it cooks.
I wiped the tops of the jars with a clean cloth, then placed the lids and rings on. (Don’t crank down on the rings.)
Time to can. I placed the filled jars onto the rack in the instant pot max and made sure the water level was 1/4 way up the jars.
I noticed after I took this picture that my temperature setting was on Celsius. I’d set it to Fahrenheit afterwards. Press the canning setting, max pressure, no vent, natural release, and time needs to be 75 minutes or 1 hour and 15 minutes. I hit start and let it do it’s thing.
Once the Max had naturally released, We removed the hot jars and place on a towel and let cool. The lids popped as soon as we removed them.
They turned out so nice! Look at all the natural juice that each jar made. I could use this in some chicken chili or noodle soup, or even in a casserole dish.
I’ve been wanting to try this and now I’m going to try some different foods. It was very easy and rewarding.
We Process Our Own Venison
For the past few years we have been processing our own venison. My husband is a hunter and we are big DIYer’s. We like to do whatever we can on our own. We are not experts but we are getting better at every one we do.
After my husband skinned the deer, he cut up sections of meat into big chunks and soaked them in a very clean cooler with ice cold water and about six tablespoons of table salt. He did this over night then proceeded to dump the water and add fresh cold water and ice, no salt. He did this until the water was no longer bloody. It took a couple of days.
When trimming the meat it is important to get rid of all the silver skin, this helps get rid of the gamey taste.
These are the back straps. He likes to cut them up into steaks. These are perfect for the grill! We like to vacuum seal these.
We have a meat processing place near by and they sell beef fat. We bought a giant bag for $2! My husband likes to add 15% fat to the ground burger. Here he is chopping the fat into small pieces for the grinder.
We weigh the venison and the fat to figure out the ratio.
Here he is cutting up the venison to be ground into burger.
Here is the grinder we use. We bought it off Amazon.
We have the meat and the fat ready to go. it helps if you put the meat into the freezer for a half hour or so but this is not necessary.
These are the blades we use. We grind through the wagon wheel blade first then once it’s all ground we grind through the smaller blade. It gives the burger a really nice texture.
Here he is grinding a little venison then adding a little fat.
This grinder has a foot pedal so you can stop and go as needed, hands free.
We have several large bowls close by so we don’t have to stop.
Here is the beautiful, fresh ground venison burger. Ready for hamburgers, chili, tacos etc.
We use wild game bags and ziplock bags for the burger. We got 30lbs of burger and a bunch of steaks from this deer. The next deer we are going to experiment with making hunters sausage in our smoker.